Hi Friends! I think my favorite DIY from Easton’s Super Mario Birthday Party was the Super Mario coin box punch boxes that I made for him. Since Sawyer’s birthday is only 3 weeks before Easton’s I just held on to the “poke-a-ball” punch boxes that I had made and decided to recycle them. I repurposed the boxes into a row of coin boxes that Easton could punch from underneath (just like Mario does in the game) but instead of coins popping out, Easton got his birthday gifts!


Step 1: I started with the “poke-a-ball” punch boxes that I had made for Sawyer’s celebration. These boxes were 10 inch cubes. In order to cover them, I cut 3 pieces of 20×30 inch white foam board in half vertically.
Step 2: Next, I hot glued one of the pieces of foam board to the top of the first punch box (lining it up on the far right).

Step 3: Then, I repeated Step 2 with another punch box (this time lining up the white foam board on the far left). Next, I hot glued these two boxes together.
Step 4: Next, I hot glued the last punch box on the far right (as seen in the photo above).

Step 5: For added reinforcement, I then hot glued the 4 remaining white foam board strips on the top and back of the punch boxes. This created the long column effect I was looking for.
Step 6: Next, I added a 10 inch piece of foam board to the top to create an enclosed column. This also made the whole piece more sturdy.
Step 7: Then, I wrapped the entire column with brown kraft paper.

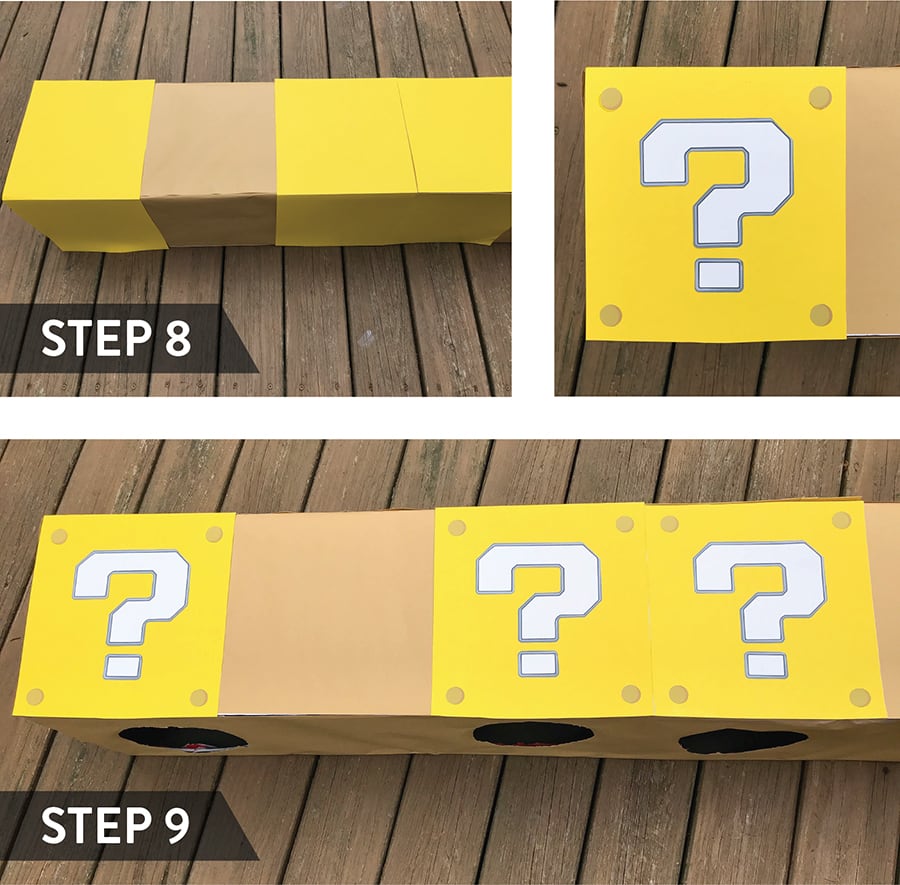
Step 8: After wrapping the column in kraft paper, the punch box holes will be covered. I then cut out the existing holes (this can be done roughly as you will be making rings to cover the edges in Step 10) to make sure I was placing the yellow paper for the coin boxes in the correct place. Next, I cut three strips of yellow poster board 10×20 inches. Then, I folded the poster board in half and glued it on the top and front side of the column.
Step 9: Next, I glued a question mark in the center of each coin box. Then I added 4 circles in each corner to create the look of the bolts.

Step 10: Next, cut yellow rings out of poster board to cover the holes beneath each coin box.
Step 11: Then, tape or glue white tissue paper to each ring.
Step 12: Now place a gift or prize in each coin box and glue the ring and tissue paper over the hole.
Step 13: Rotate the row of coin boxes right-side-up and draw bricks on the kraft paper with a black marker. Lastly, display your Super Mario Coin Box punch boxes at your party! They double as adorable party decor too!

I hope you enjoyed this tutorial! If you make these Super Mario Coin Box Punch Boxes I’d love to see them! Please follow along on Instagram and tag me. I love connecting with all of you!
 PIN FOR LATER:

Leave a Reply